
or “How I learned to stop worrying and love ObjectAudio in QLab”.
A few months ago I was offered the opportunity to be Sound Designer for The Questors’ production of Romeo and Juliet. If I remember correctly, the invitation was worded something like
Mike! The sound designer for Romeo and Juliet has stopped responding to email. Can you help?!
Of course, the answer was “Yes!” but I was also aware that this would be my first production in the wonderful Judi Dench Playhouse, an Olivier-like amphitheatre space.
Romeo and Juliet is basically “Final Destination” re-cut as a romcom. The director wanted a brooding Gothic vibe (ruined church, cowled monks in silhouette, Das Omen with nob gags).
Some of the specific cues / effects #
- An approaching thunderstorm while the audience is taking their seats.
- Two actors circling each other on the stage, while one of them (with their face hooded) speaks with an amplified otherworldly voice that reverberates around the audience.
- A letter is passed around the stage, following a rapid choreographed path, with some kind of sound effect following it.
- Ominous evolving soundscapes.
- Dancing to music composed specially for the show.
So we’re going to be dealing with long running fades, multi-channel audio, radio mics, and live effects.
Oh, and with a Sound Department budget of zero.
Now, I’ve done quite a few of these things before, but not all at once in an unfamiliar venue.
We’ll skip over several weeks of auditioning hundreds of different sounds to try and find useful recordings of outdoor markets, larks, nightingales, and the sound of a ghost walking over your grave.
Quick shout-out to everyone who has contributed Public Domain / CC-0 sounds to freesound.org. Most of the thunder sounds I used were from my own field recordings which I shared to freesound back in 2016 on that basis.
The rig #
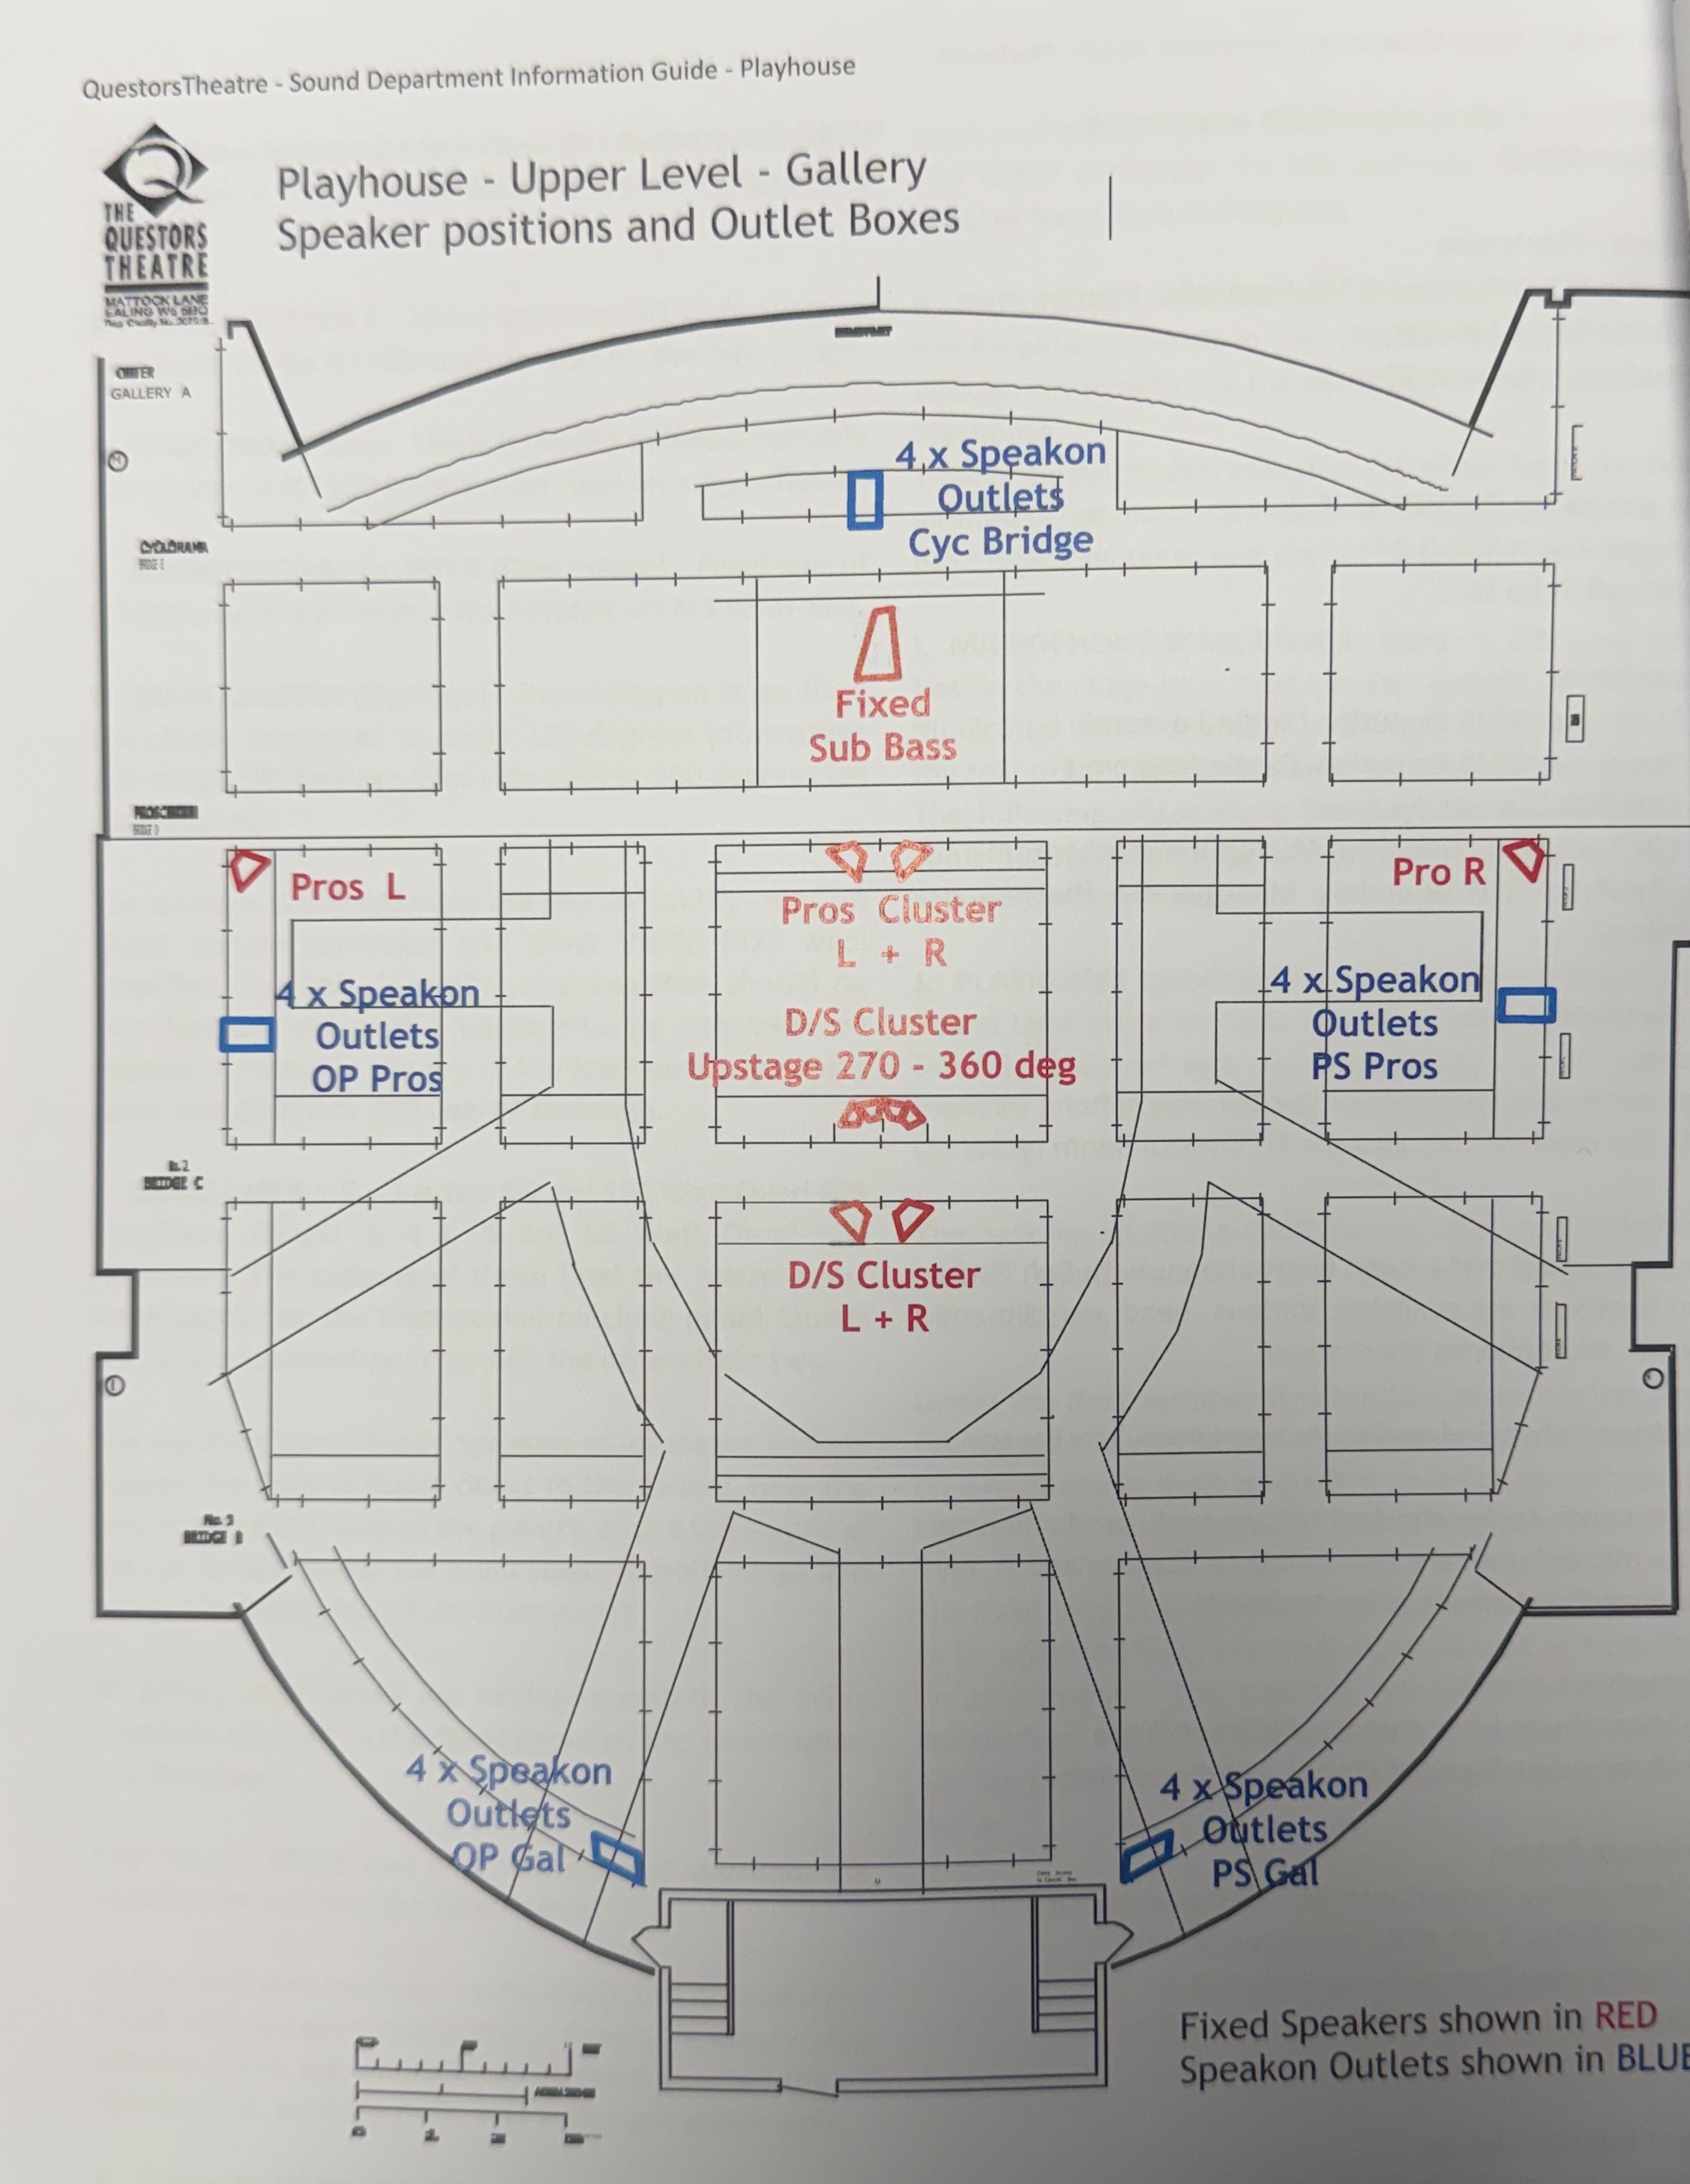
The Judi Dench Playhouse (JDP) has a basic house rig of 16 channels:
- Centre Pros (L/R)
- Wide Pros (L/R)
- Cyc (L/R)
- Upstage Cluster L/R
- Auditorium L/R
- Spare 1/2 A/B (4 channels)
- Sub A/B
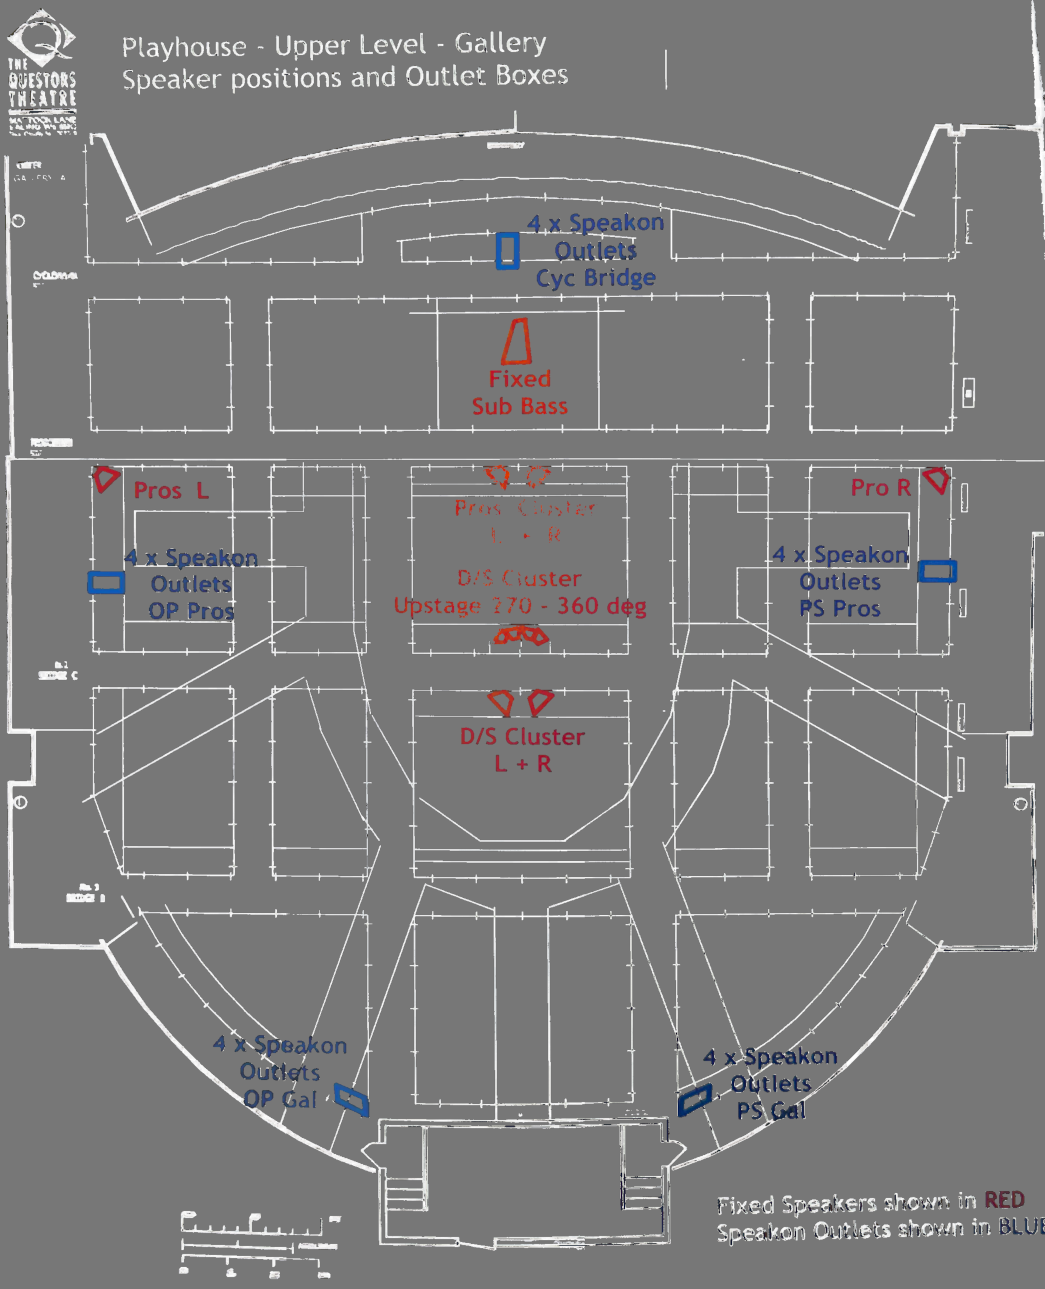
There’s even a handy diagram in the well-hidden dead tree documentation (no leopards were in evidence, but I was suitably wary)
This is all rather neatly accessible over Dante to the amp rack in the dimmer room.
After stumping up for Dante Virtual Soundcard (and somewhat naively getting the bundle with Via which I haven’t found a use for yet) I was able to connect my macbook running QLab to the Dante network in the auditorium and instantly route all 16 channels of audio over a single ethernet connection.
So that leads me to …
Top tip #1: Build and tech the show directly on a laptop in the auditorium #
There’s a mac mini in the control room, but it doesn’t have much remote connectivity (just screen sharing, no file sharing or SSH) so it’s a pain to update.
I was editing a lot of the sound files during the Tech (eg using Ableton to sync up acoustic recordings so they could be looped as a round, fixing levels and trimming clips in Audacity, downloading additional sounds and music). It would have been a nightmare to have to run upstairs with a USB drive to copy over the edits before being able to hear them in the space every time.
I later learned that screen sharing with the mac mini can use “standard” or “high def” mode. Use “standard”. High def takes over the whole machine and we had an unintended reboot as a result when someone else tried to use it at the same time.
With the Dante Controller, it took just a few quick clicks to route the sound from my machine instead of the original routing. And also (thanks to Lloyd W getting absolutely the right kit), routing the radio mics as sound inputs for QLab.
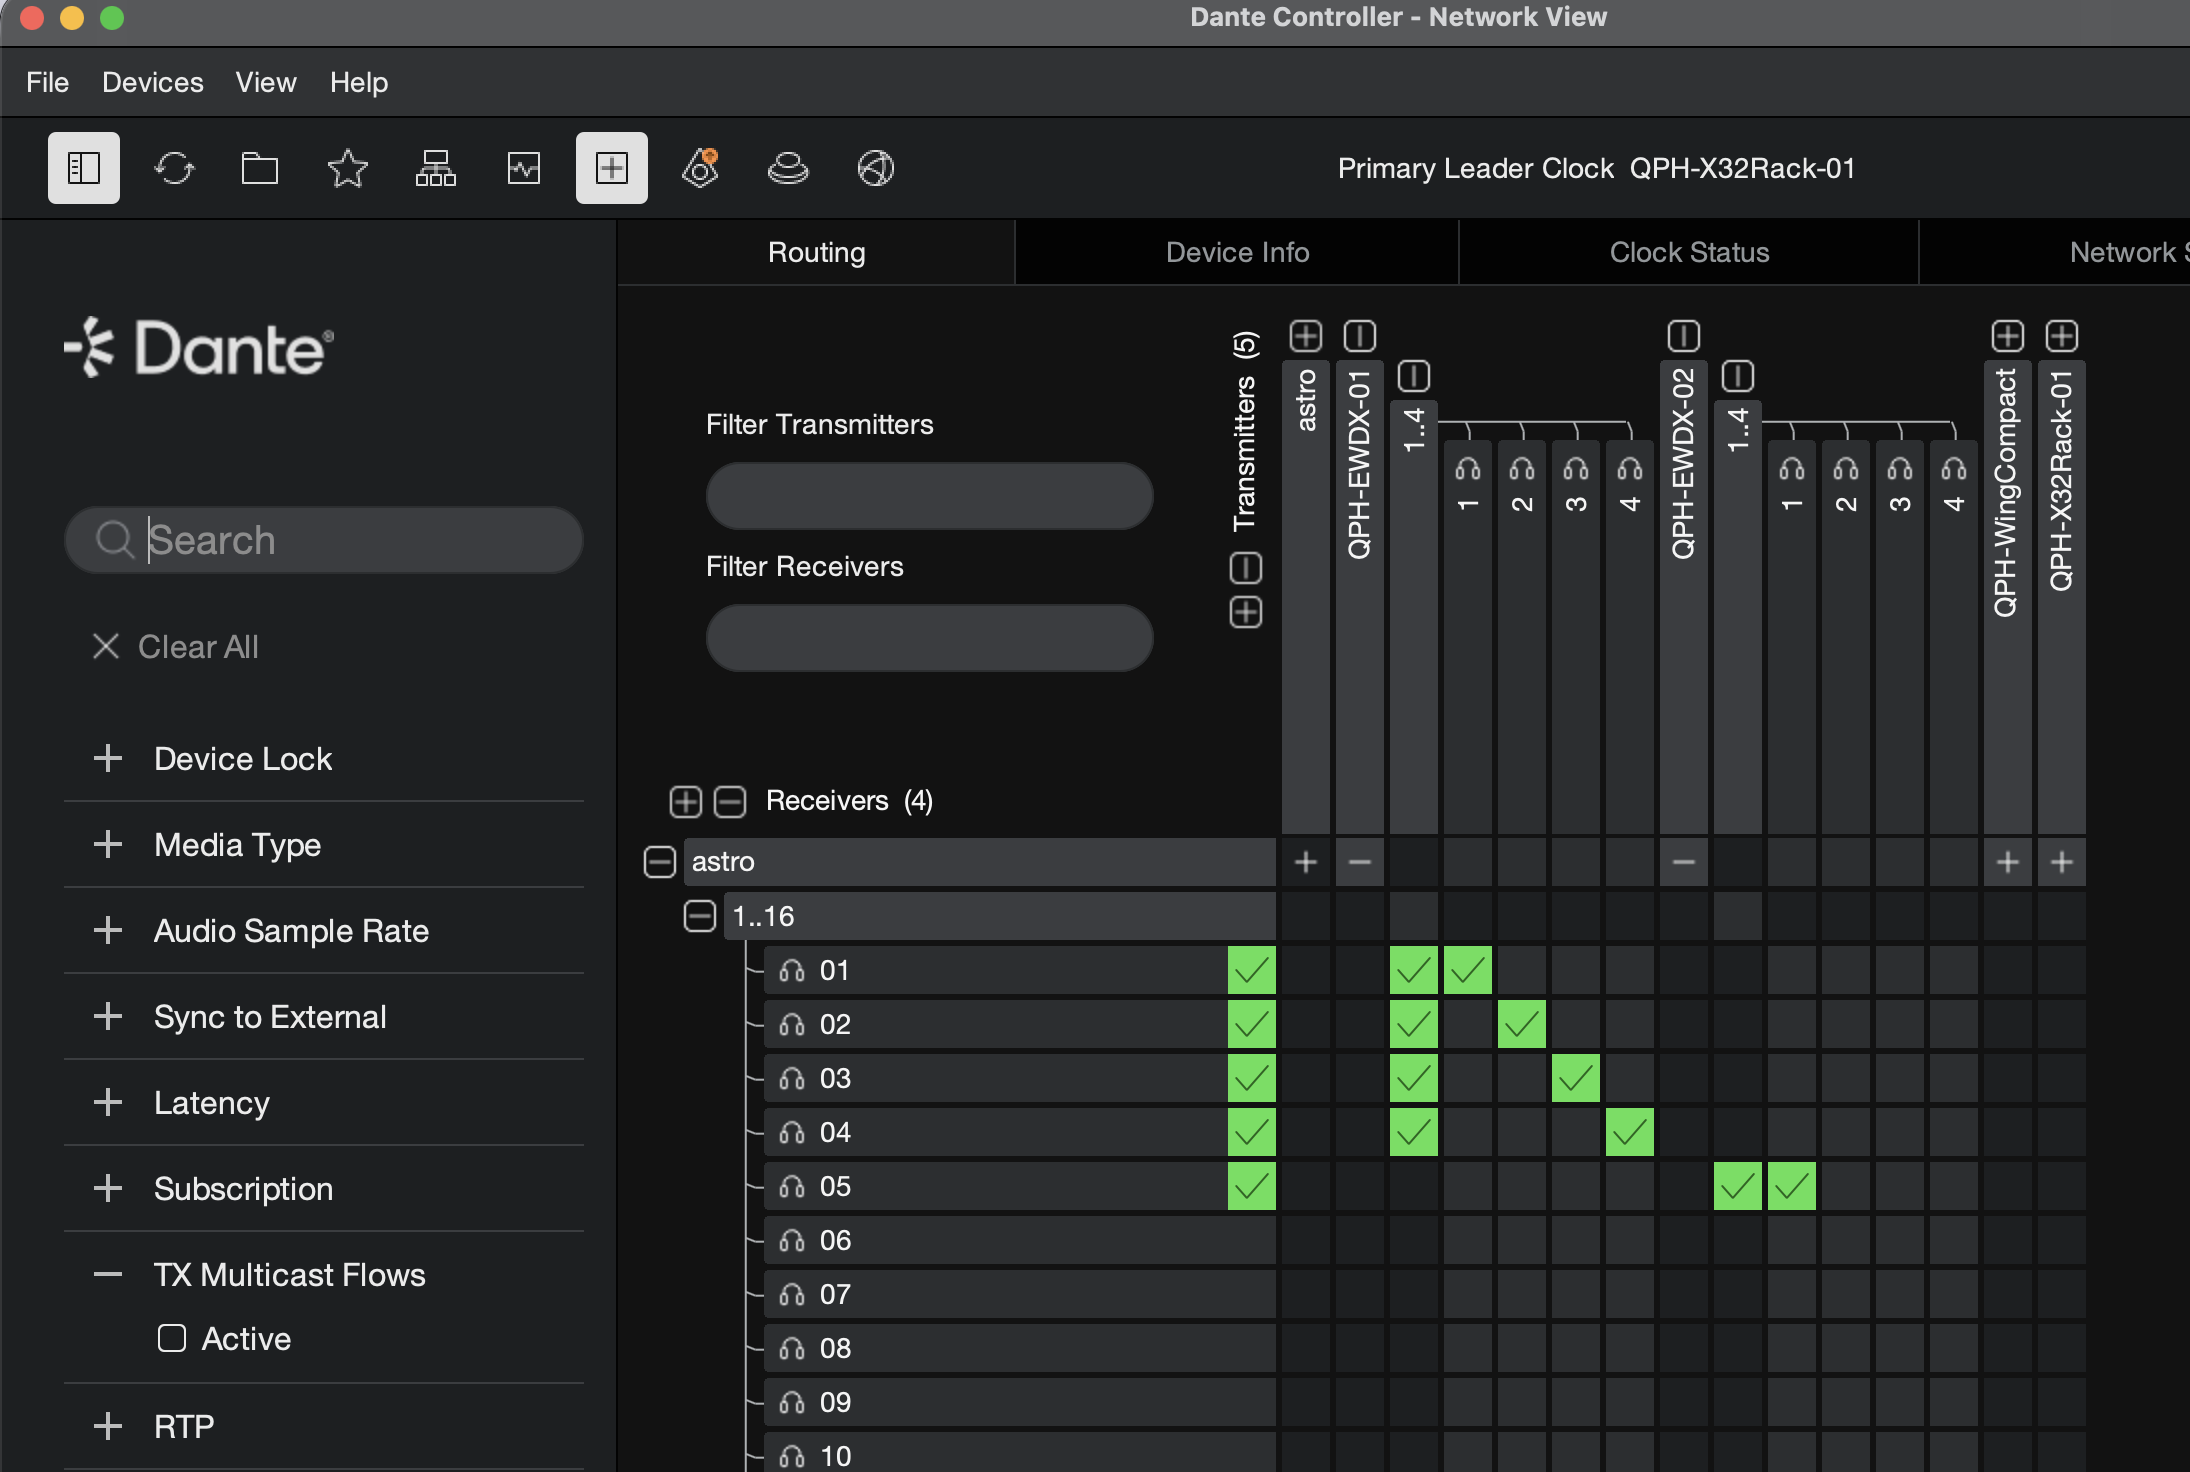
Oh yes- there are now radio mics. Really nice, just completely undocumented. Lloyd was very generous with his time and expertise getting things working, but it would be good to have some documentation too. It saved me from having to try out my ropey old studiospares / gear4music radio mics (which would not have worked anywhere near as well as the Dante-connected Sennheisers).
Top Tip #2: Use rechargeable lithium batteries in the belt packs #
The Amazon Basics AA batteries did not survive the Tech without running out of charge. We had no problems with 3600mAh lithium rechargeables (which charged in their charger in the dressing room after every show).
As the show had no sound budget, I got a set of batteries for myself, but I would highly recommend getting a set to go with the radio mics.
Programming the show #
With around 8 channels of sound in the main auditorium, I did not want to be managing virtual sound placement by setting levels on each channel individually. It’s tedious, easy to get wrong, and hard to update when things change.
It’s fine for the director to decide it’s better if the magic widget is carried from stage left to stage right instead of vice versa, but it’s an absolute pain if that means editing all 8 channels in the audio cue and the fade cue.
Enter Object Audio in QLab.
There is quite a lot of documentation and tutorial content online which I won’t repeat here, but I will give some concrete examples of how I used it.
Object Audio 1: Mapping sound to the physical space #
This is probably the first application most people think of, and with good reason. With a schematic of the stage and sound kit, it was fairly easy to create an Audio Map
- I edited the photo of the stage schematic to get better contrast and to be more “blueprint”-like.
- For each speaker in the rig, I added a “mark” corresponding to the location of the speaker on the map, along with setting the level for that speaker at 0dB (full original level).
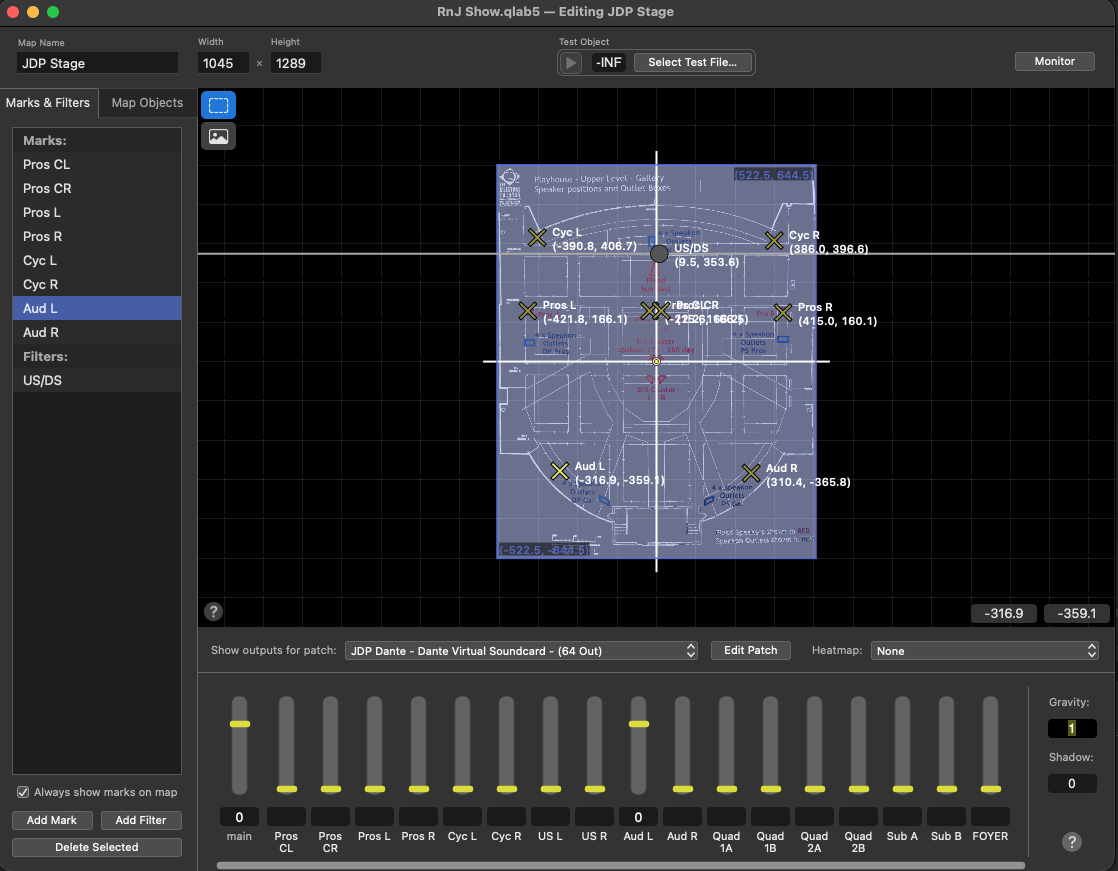
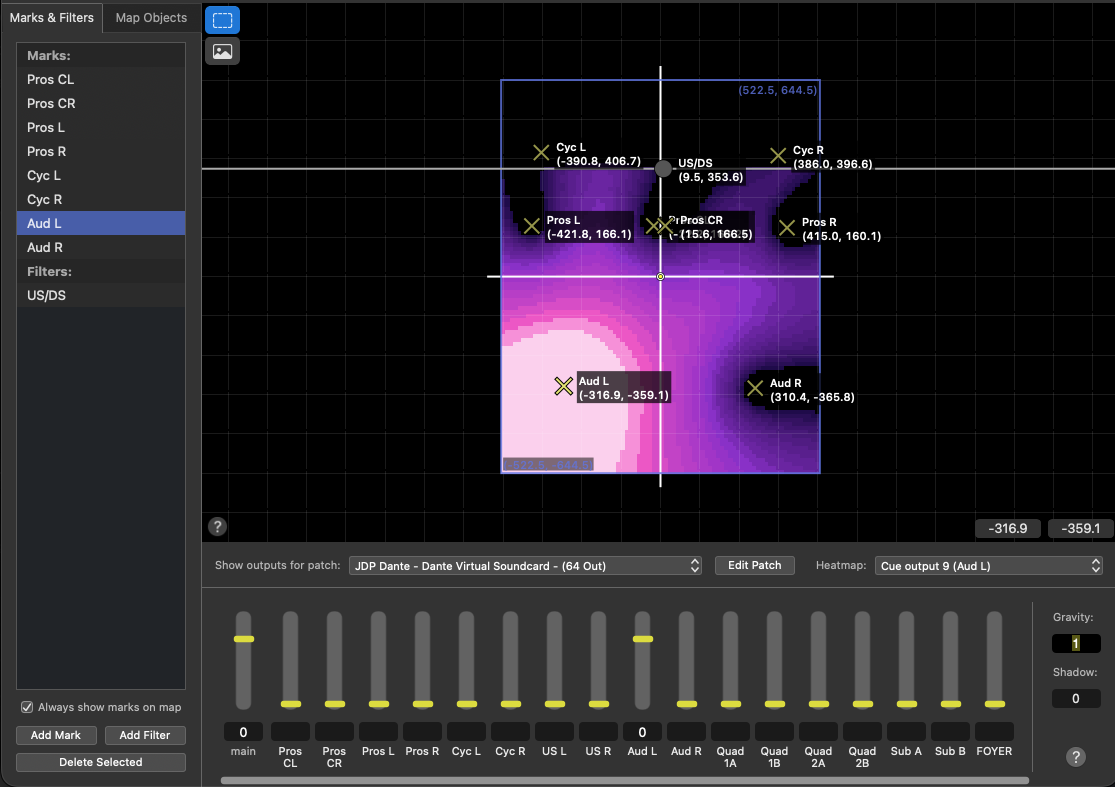
When an object is placed on the map, the level sent to each channel is calculated by its distance from the nearest marks on the map. If an object is directly on a mark, it has exactly the levels set on that mark.
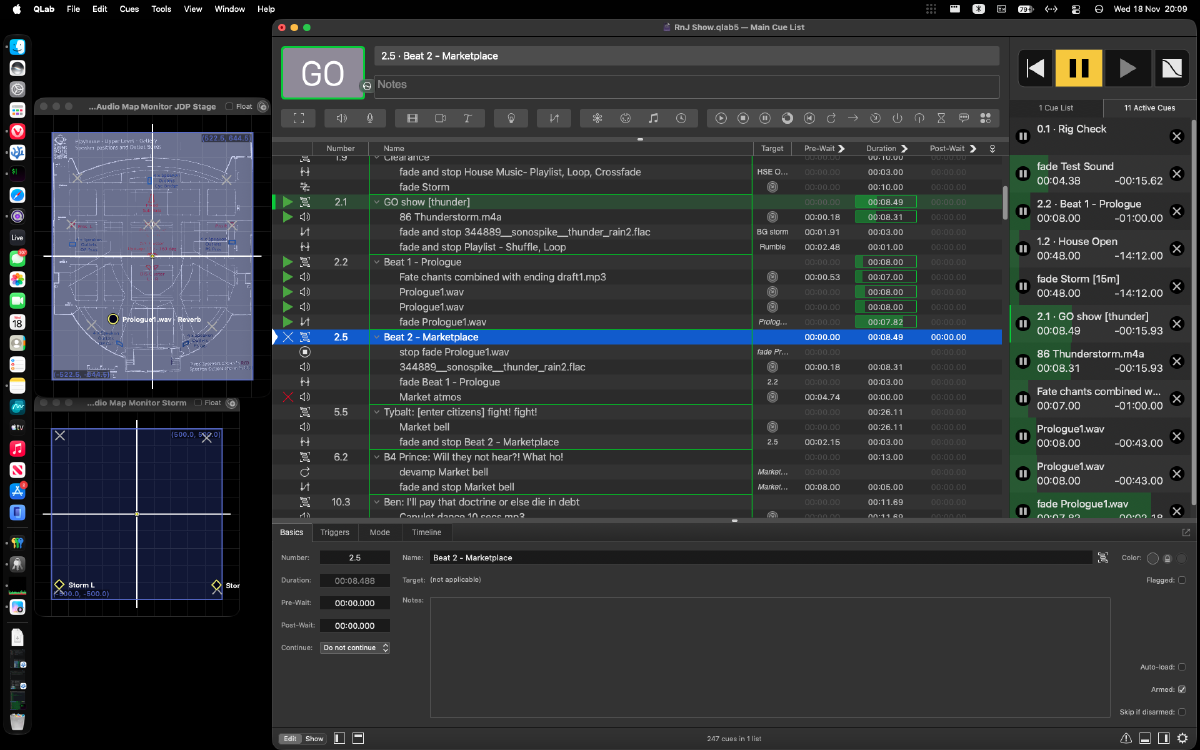
QLab shows you the areas of influence of each speaker using a heatmap display:
You can also add lines to the map called “filters”, which can separate the map into different zones, so marks in one zone don’t affect levels in the other.
For example, I wanted to ensure that any sound objects located upstage of the pros only get sound from the speakers at either end of the cyclorama, and therefore no sound from the downstage speakers. So I created an US/DS filter:
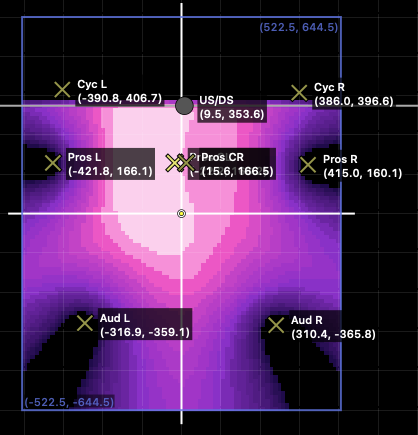
Now, we have created a map with a single channel set to 0 for a mark which corresponds to its physical location.
When we put a sound object somewhere in the stage area, QLab will accurately calculate the right levels from each speaker to simulate the sound coming from that location.
For example, we have a scene where a letter is passed around the stage in a complex path.
To program the scene, we do the following:
- Create an Audio cue for the sound which we want to play.
- In the Object tab for the Audio cue, select the Audio Map we want to use (I called this one JDP to represent the physical playhouse)
- Add an object to the map (in this case, an object called “Letter”)
- Select which channel(s) of audio from the sound file are going to be sent to the Letter object, and at what level. QLab adds a white triangle dog-ear to the Levels and/or Objects tab when you have set non-silent levels or crosspoints.
- In this case, we have some Levels set (which don’t change), and then the Letter object (which is about to move).
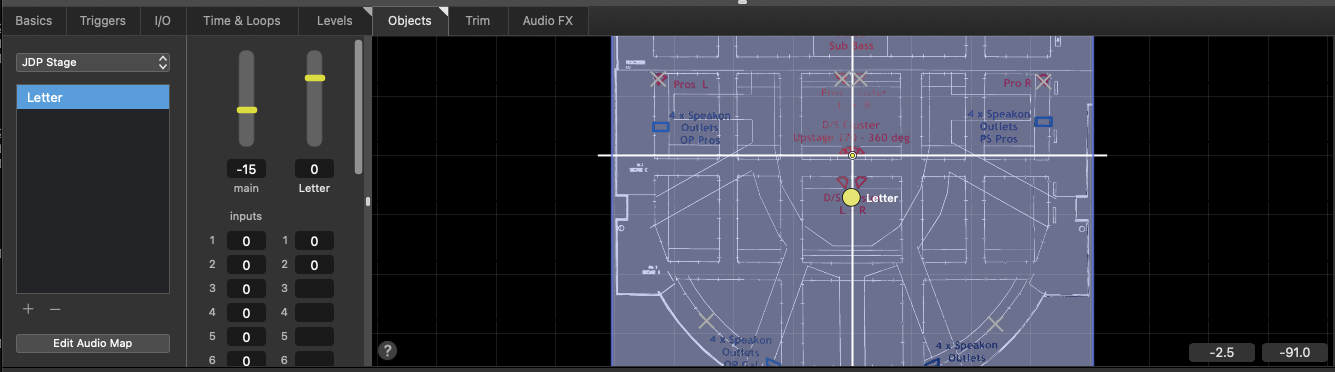
Now you can edit the location of the object in a Fade cue:
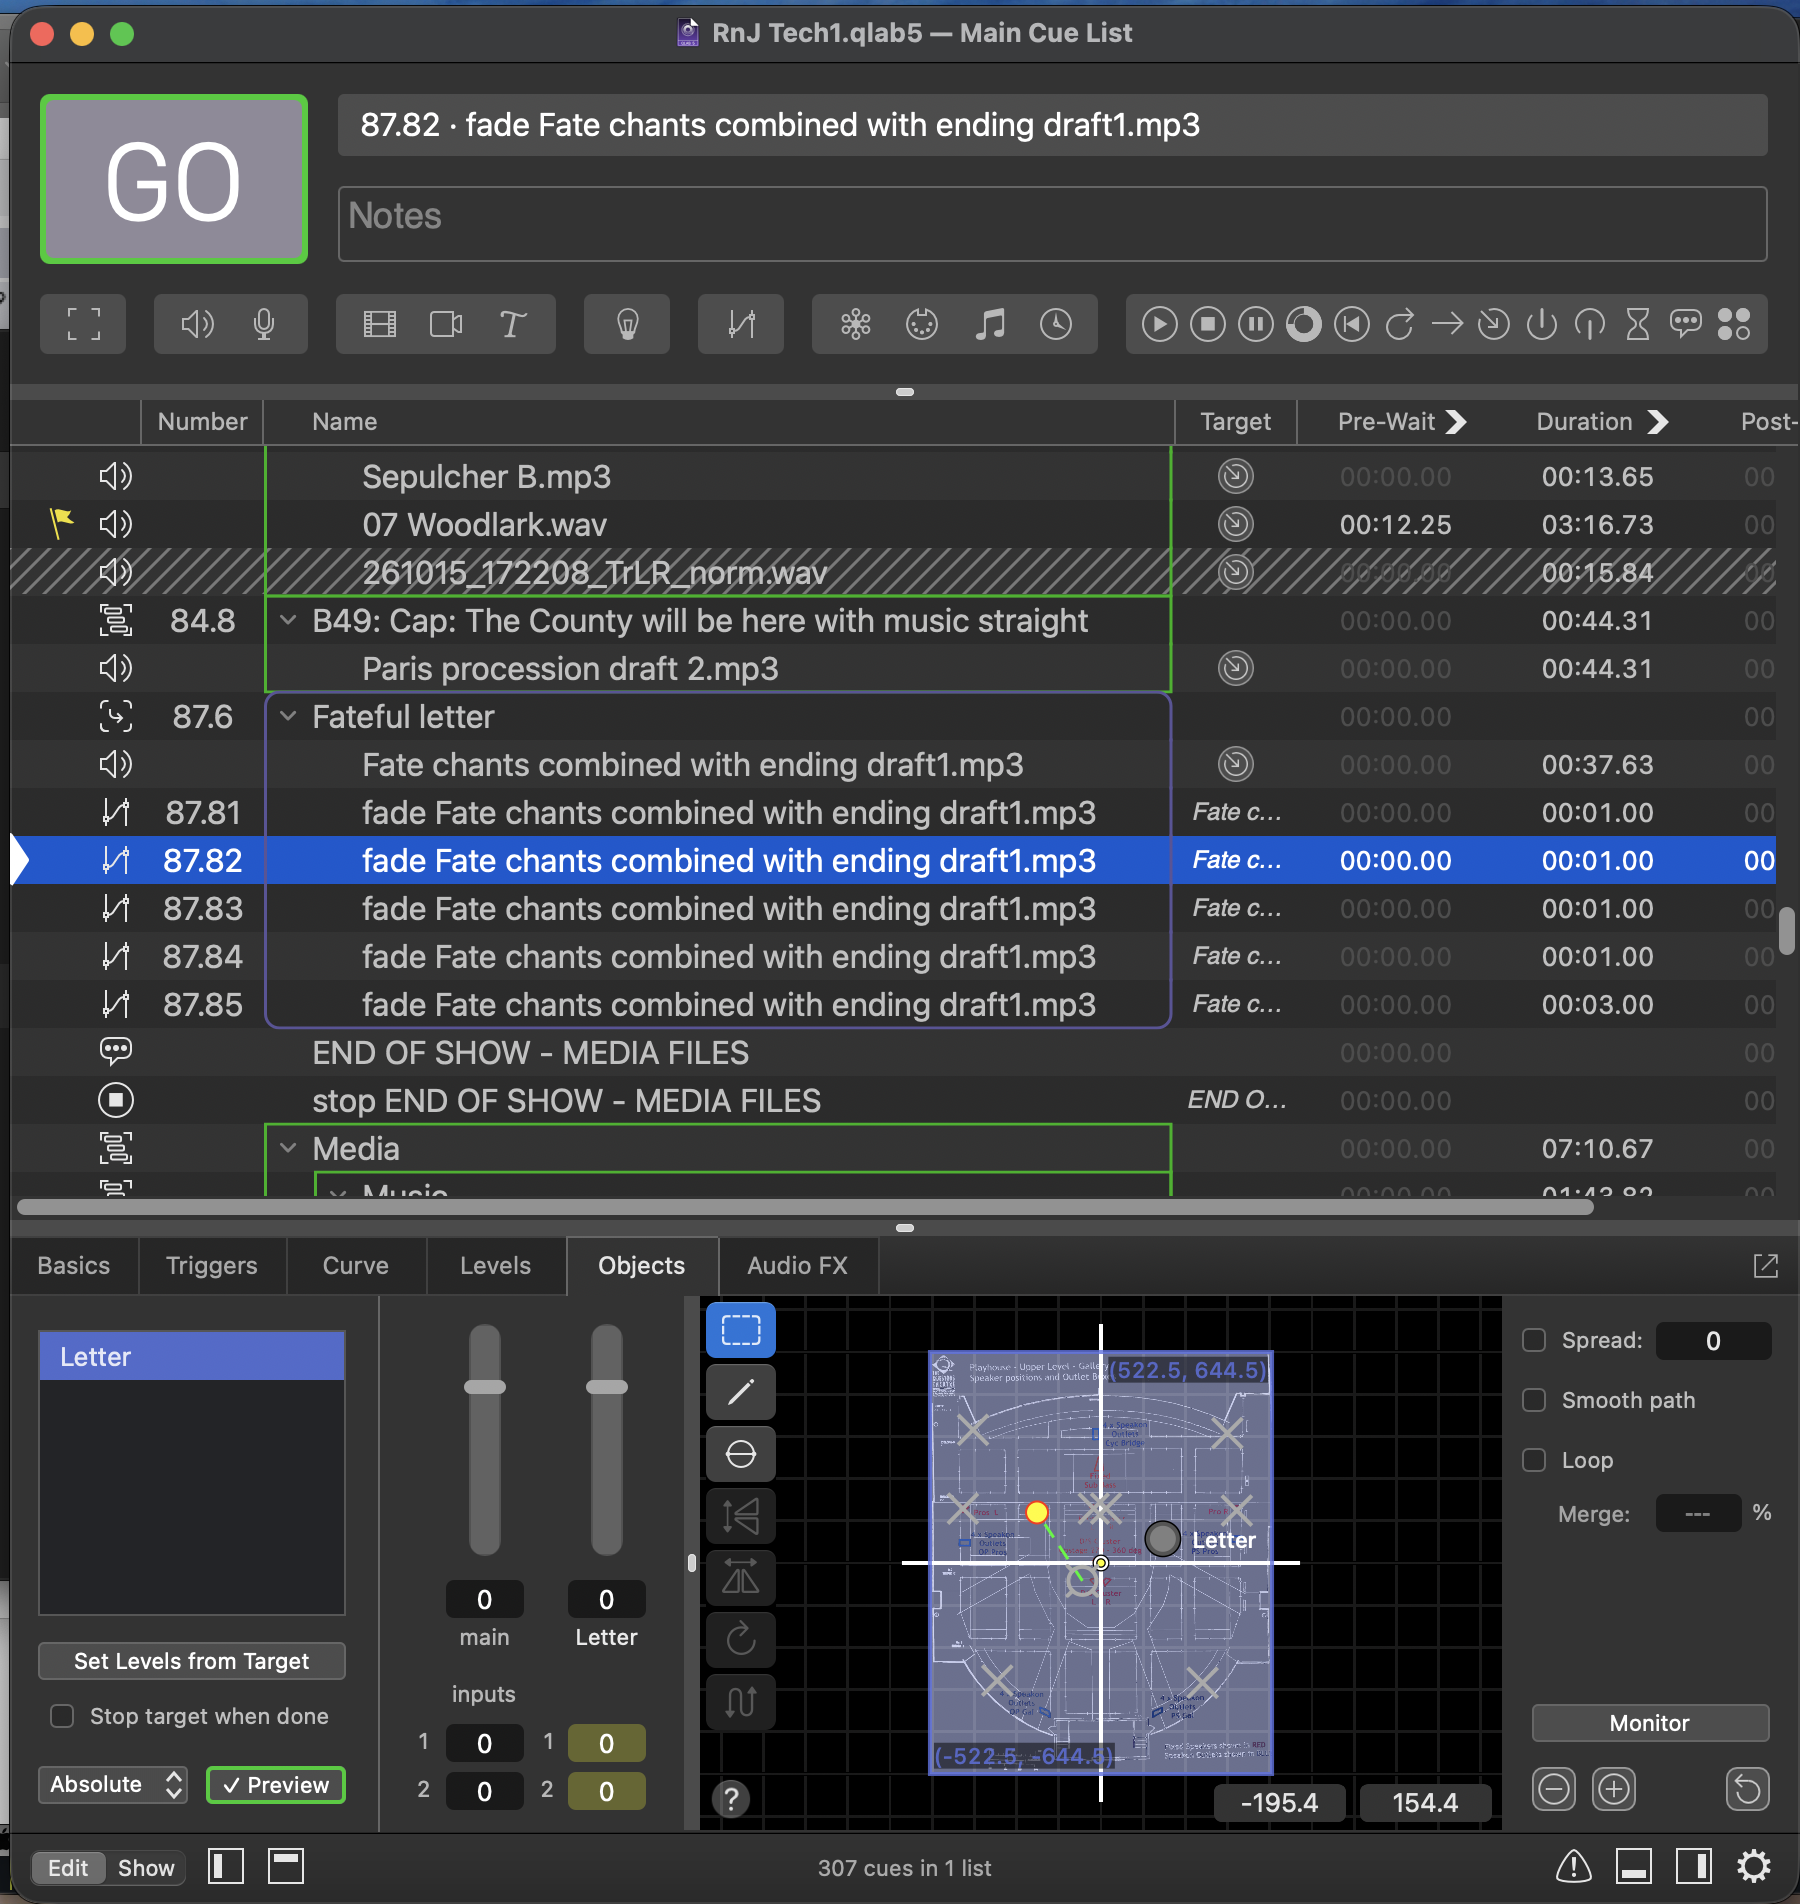
Here we move the Letter object to the place we want it to be at the end of this fade. The map shows where the Letter object currently happens to be, but that can change over time. At GO time, the cue simply moves the Letter object from wherever it is to the destination you have set.
In this cue stack, we have 8 distinct locations for the Letter, which are linked with the same numbered cues in the lighting (to highlight the same location on stage).
It’s really handy to be able to express the logical intent of the cue, and have QLab do the maths to work out the levels for each location and fade smoothly between them.
Object Audio 2: Continuous motion #
Speaking of fades, QLab has some useful tooling to work with Object Audio fades. One that I used several times was the “circular path” tool. By dragging a circle to the right diameter across the space, QLab creates a smooth path for the sound to follow. And by making the Fade cue repeat, the sound keeps circling as long as the cue runs.
I combined this with FX (reverb, echo, and distortion) to give an unsettling and disturbing character to the voice of Fate (both during the prologue and the apothecary scene).
Using a Mic cue, I created an object called Reverb which then moved around the room in a circular path:
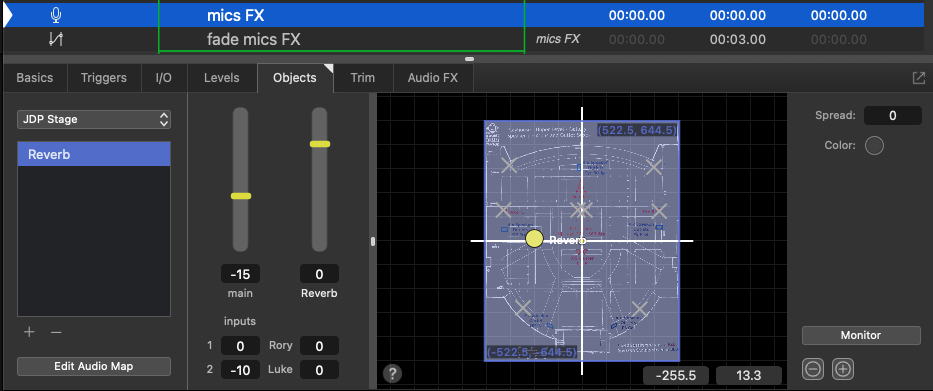
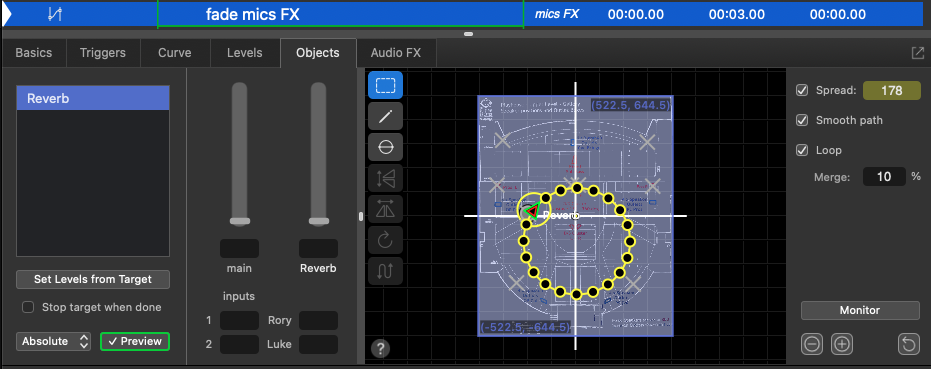
While the main Mic cue stayed in one place (for intelligibility of the speech), this additional Reverb cue was swirling around the auditorium.
Object Audio 3: Abstract changes #
The first two examples use the 2D mapping of the Audio Map to the physical layout of the stage and auditorium, but that’s only one specific application of Object Audio in QLab. The implementation doesn’t know or care about physical space, it’s just taking a point in a grid, finding the nearest defined marks (and accounting for any defined filters), and calculating a weighted value for every parameter in the marks for the coordinate of the target point.
Marks can have multiple channels at different levels, or set values for parameters of AudioFX plugins. So the journey of an object across the map can change the character of the sound rather than (or as well as) its perceived position.
I used this to simplify the “approaching storm” effect, by creating a Storm audio map with the x axis being Left/Right stereo, and the y axis going from “tiny storm, far away” at the bottom to “maelstrom over your head” at the top.
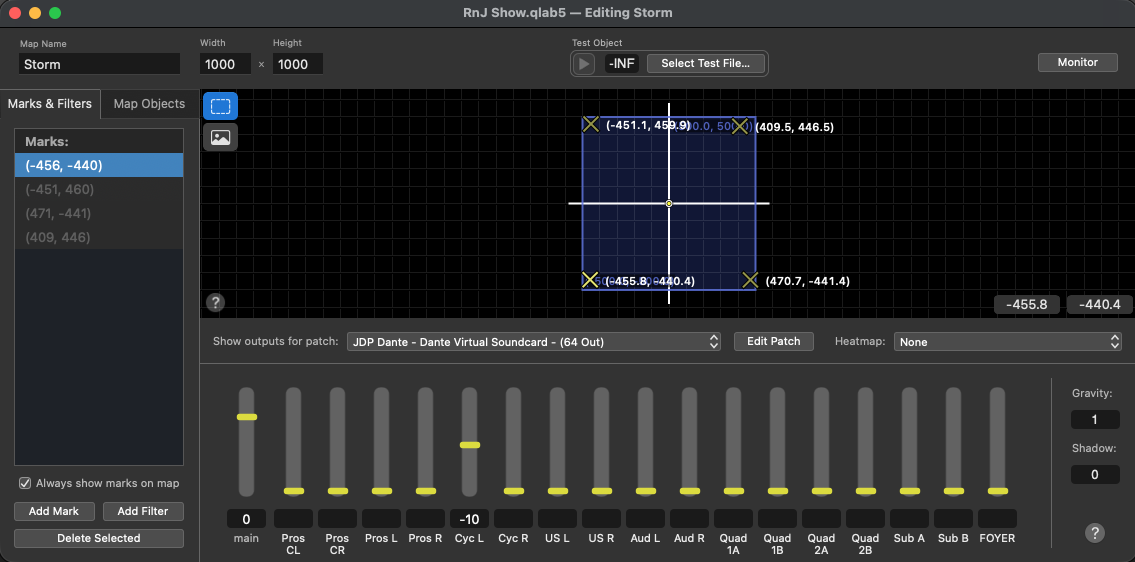
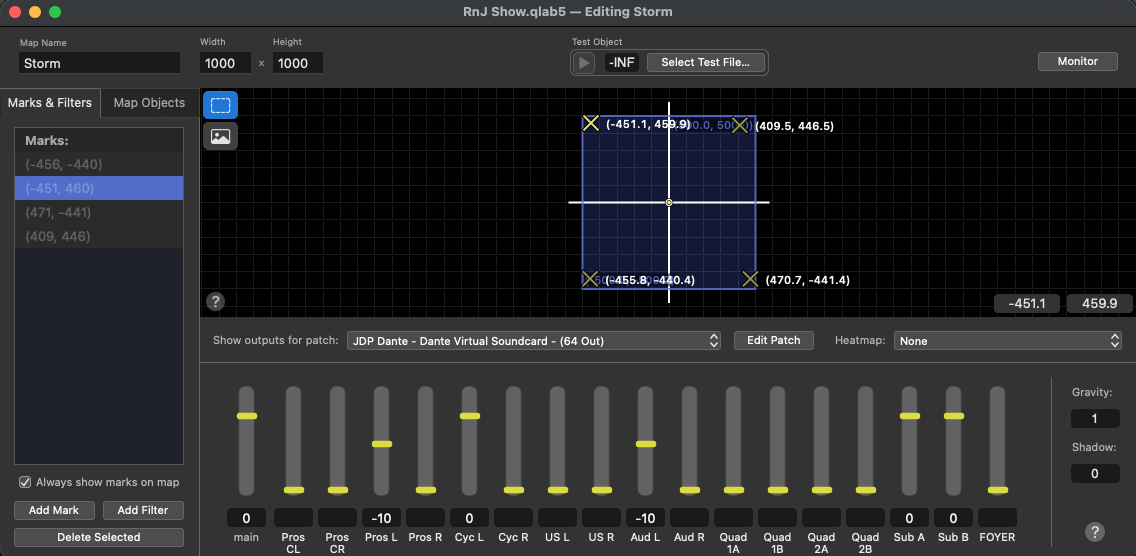
Then I could map several Storm objects and move them across the map to achieve different effects without have to spend time tuning levels for individual channels.
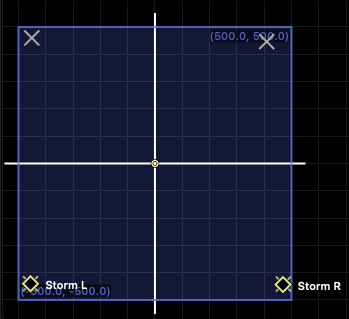
In the end, I created a slow 15m move across half of the map, then a final cue to finish the journey quickly after getting FOH clearance. This gave some evolving sound while folks were taking their seats, along with the flexibility to allow for a late start.
In this case, I could have done the same thing with a traditional fade cue, but it was handy to be able to drag the Storm objects around the map during the Tech to skip to the end of the 15m fade.
Putting it all together #
QLab allows you to have a floating window monitoring all the objects active on an audio map in realtime. This is cool to watch and useful to check things are where they are supposed to be.
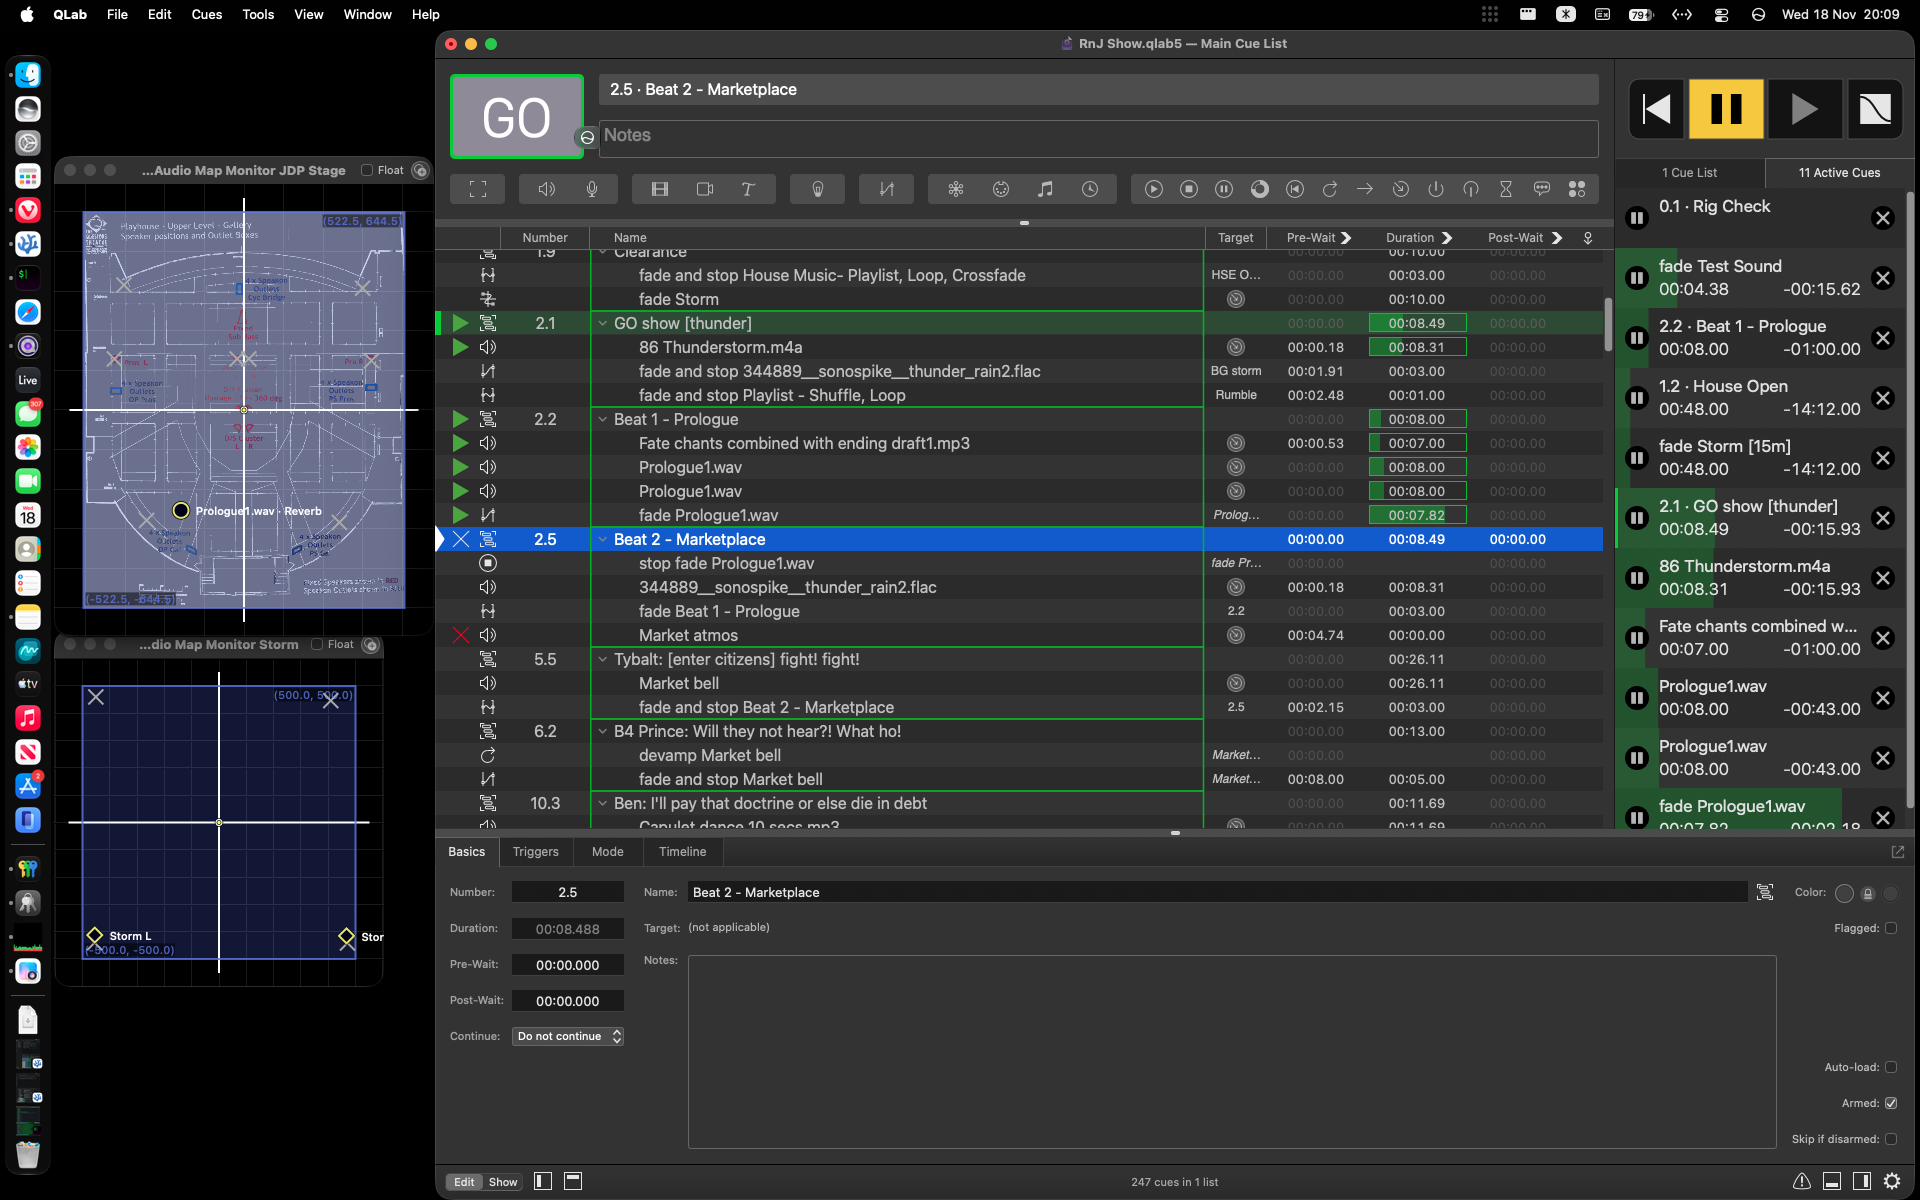
If you’re interested, you’re welcome to download and adapt this QLab file: RnJ Show.qlab5